How to Create a Reward on Ostana
Last updated: June 17, 2025
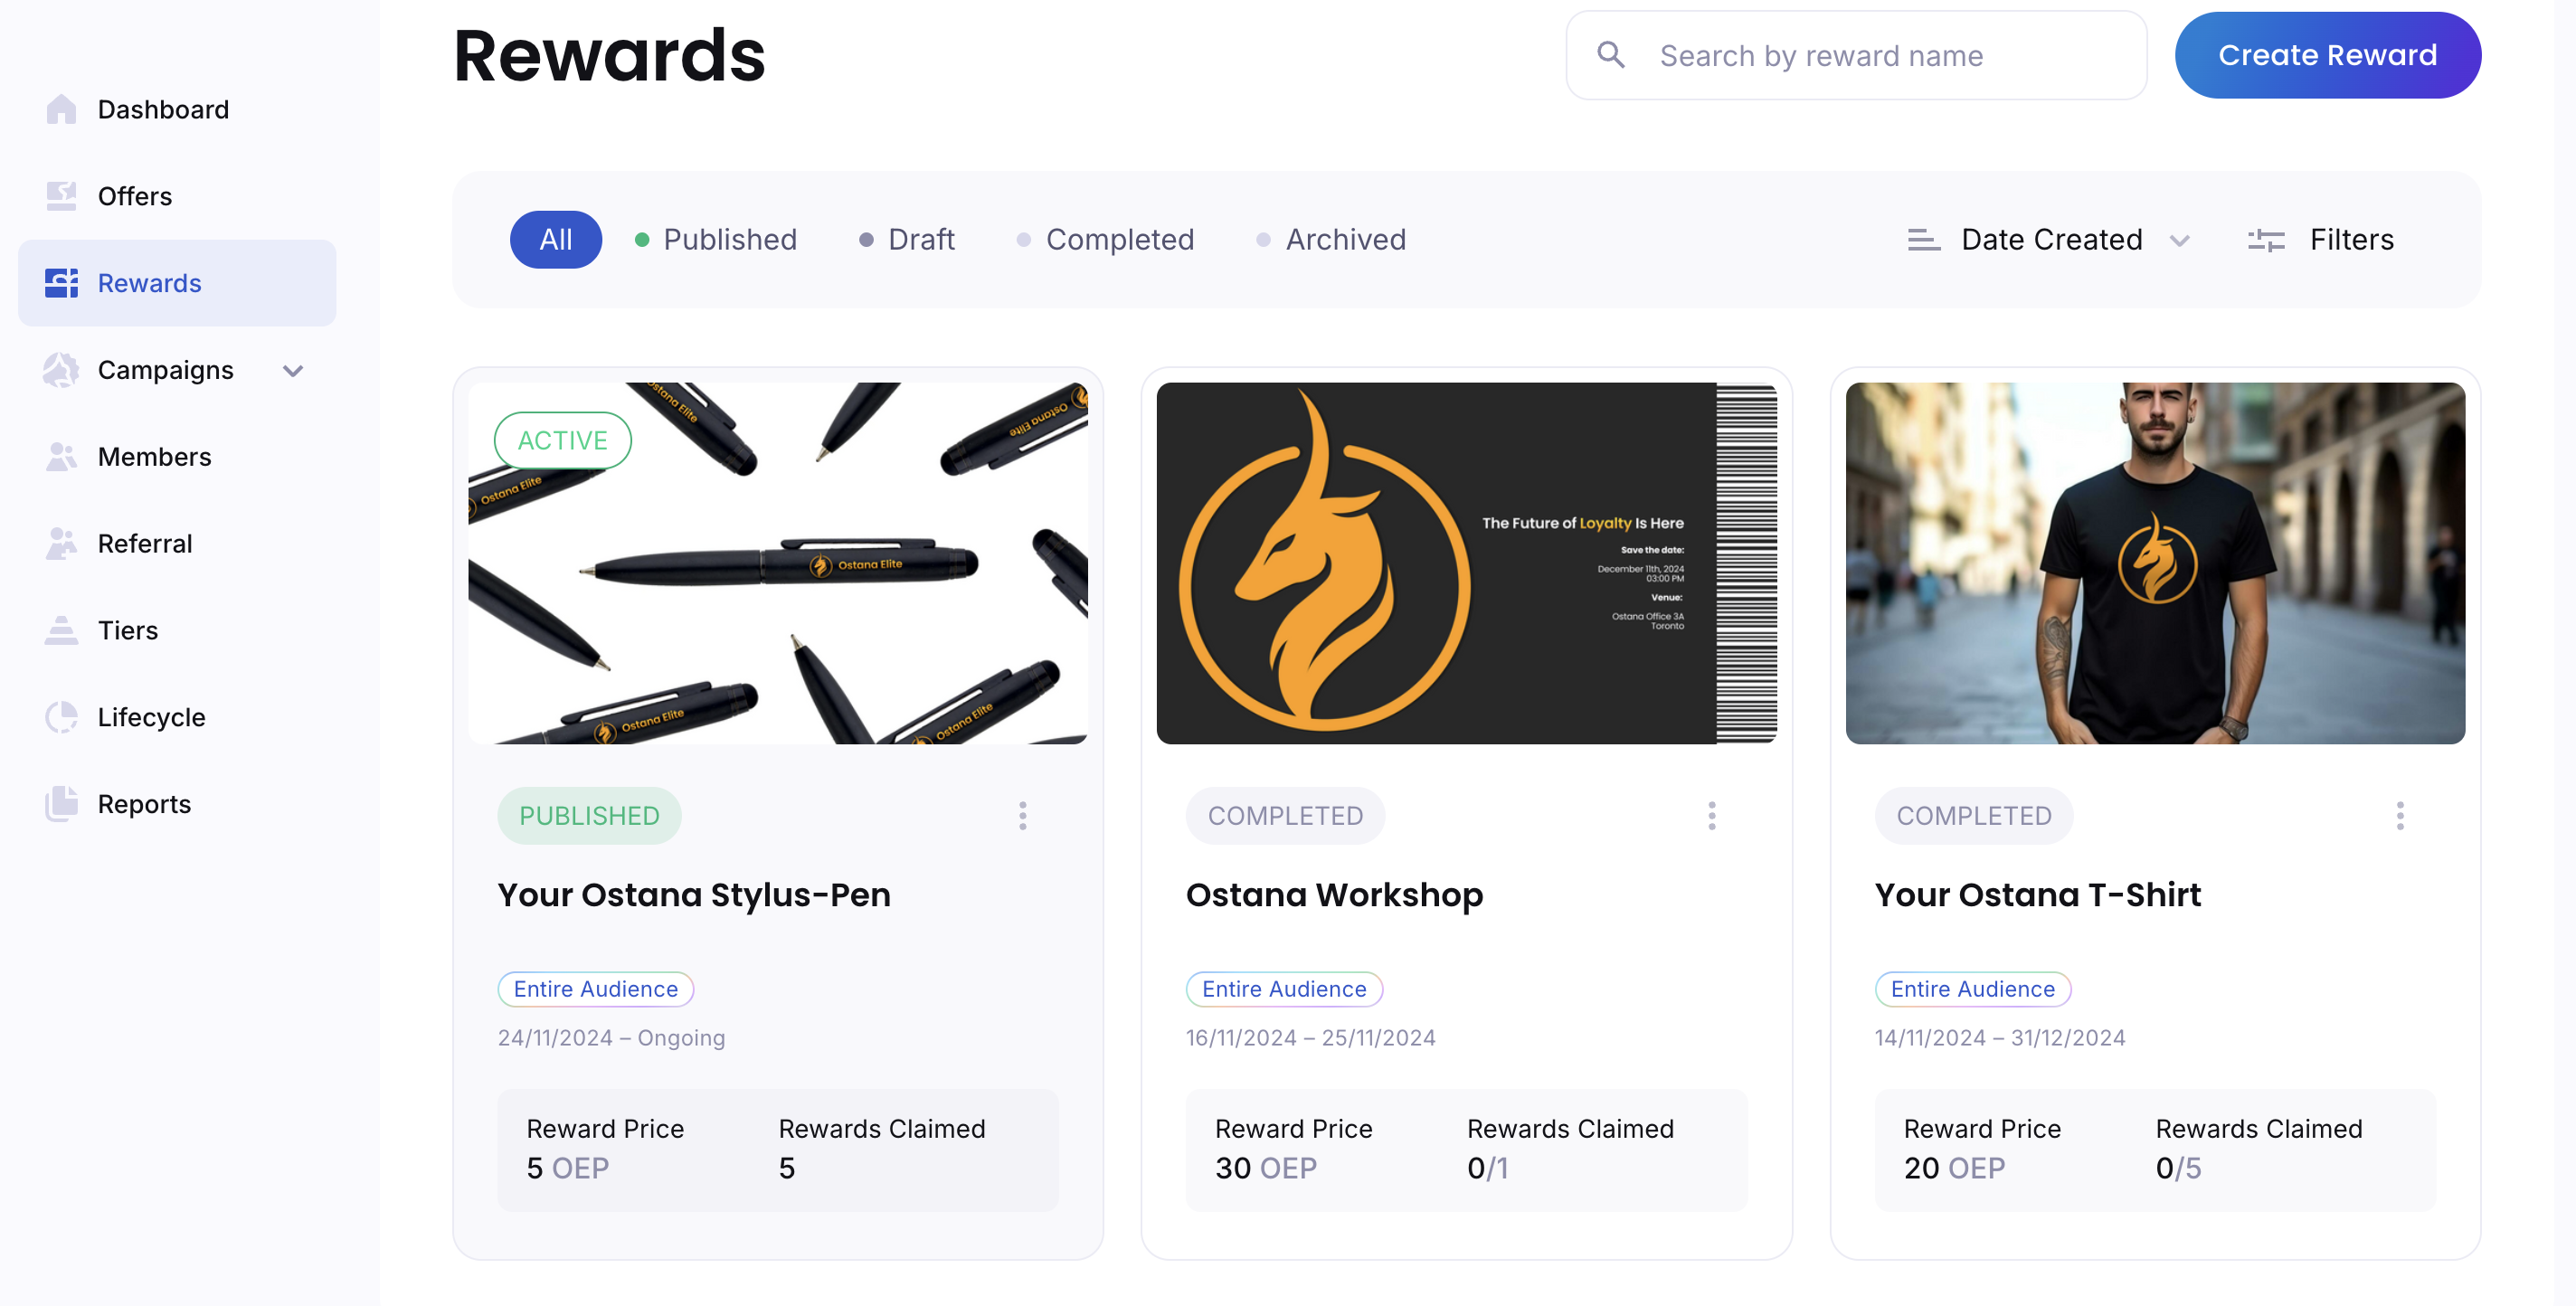
Creating rewards is at the heart of your loyalty program on Ostana. Rewards drive customer engagement, boost repeat visits, and reinforce brand loyalty.
Follow this step-by-step guide to create and publish a compelling reward for your members.
✅ Step-by-Step: Creating a Reward
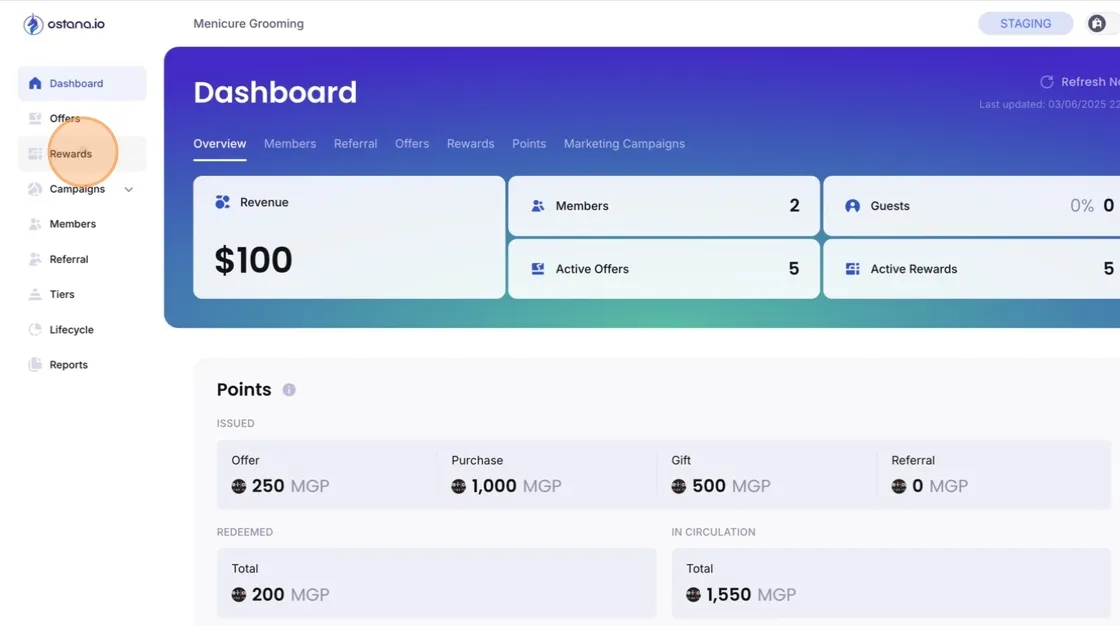
Go to Rewards
From your Ostana business dashboard, click the “Rewards” tab.Click “Create Reward”
This will open the reward creation wizard.
🎯 Step 1: Basic Reward Setup
Select Reward Type
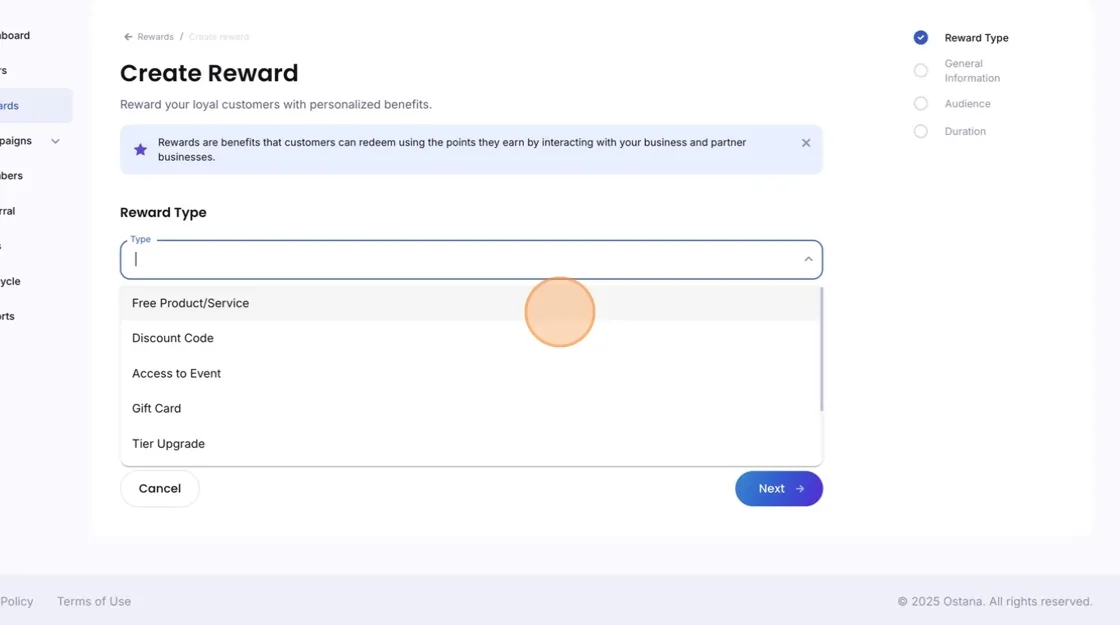
Choose from available reward types, such as:Fixed discounts (e.g., "$5 Off")
Percentage-based (e.g., "10% Off")
Surprise rewards
Custom experiences (e.g., “Free Coffee” or “Private Tour”)
Enter Product Name
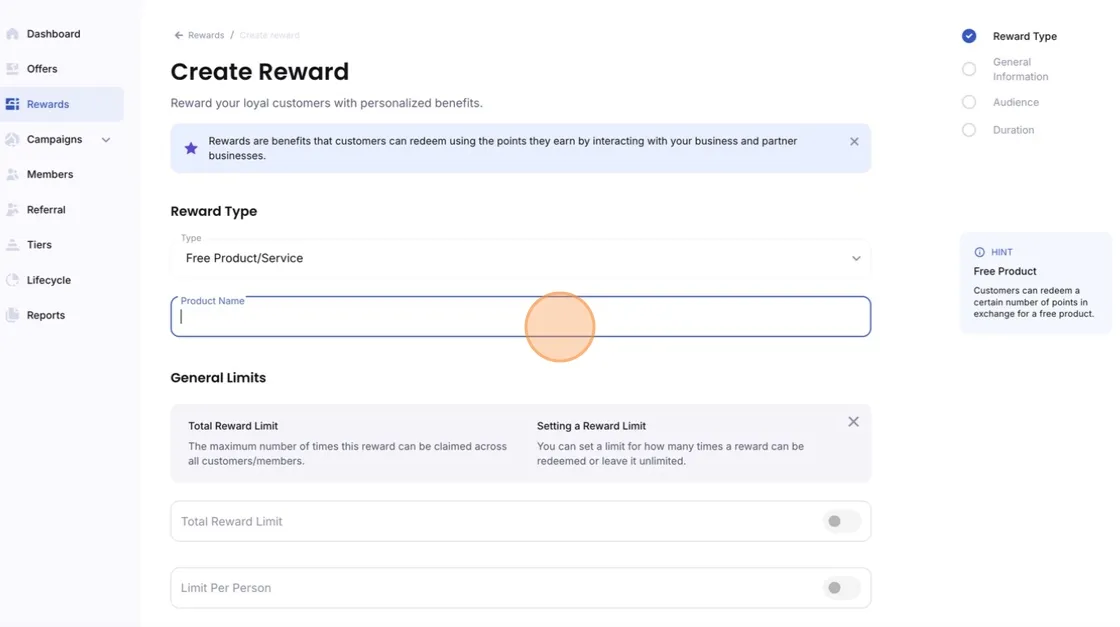
This is the internal name of the reward item.[Optional] Total Reward Limit
Toggle this on to set the maximum number of redemptions available.[Optional] Limit Per Person
Set how many times a single member can claim the reward.[Optional] Enable “Surprise Reward”
Use this toggle if you want the reward to be a surprise (no title/description shown to customers until claimed).Click “Next” to proceed.
✏ Step 2: Reward Details
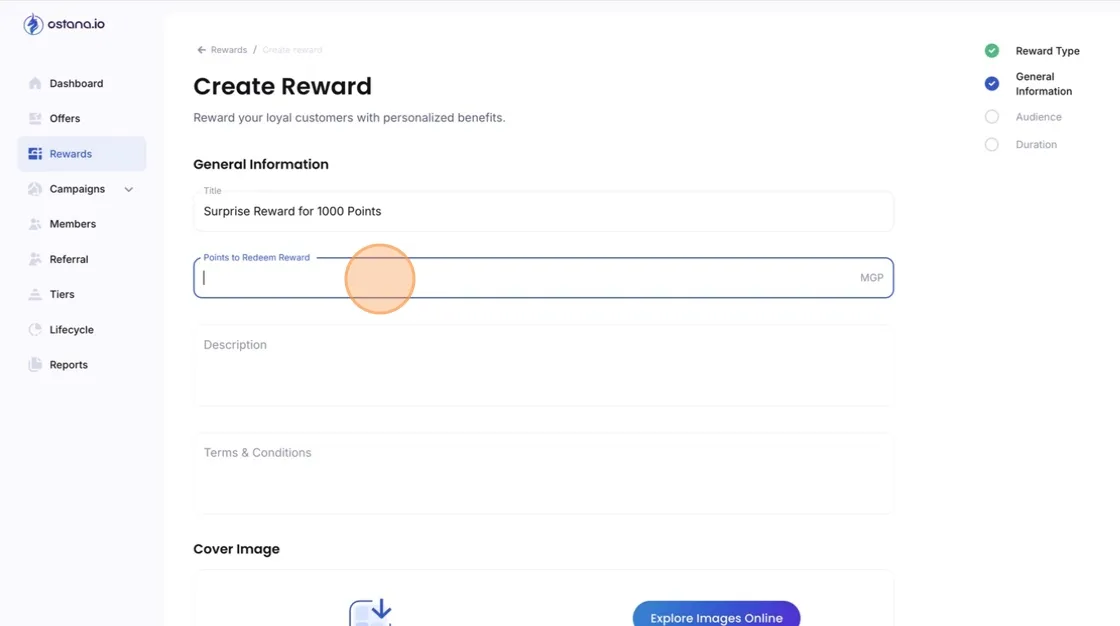
Title
What the customer sees (e.g., “$5 Off Your Next Order”).Points to Redeem
How many points a customer needs to claim this reward.Description
A short summary of what the reward includes or how to use it.Terms & Conditions
Add any fine print—validity, exclusions, or redemption instructions.Add Reward Image
Click “Collection of Covers” and choose an image or upload your own.Click “Next.”
🎯 Step 3: Audience & Validity
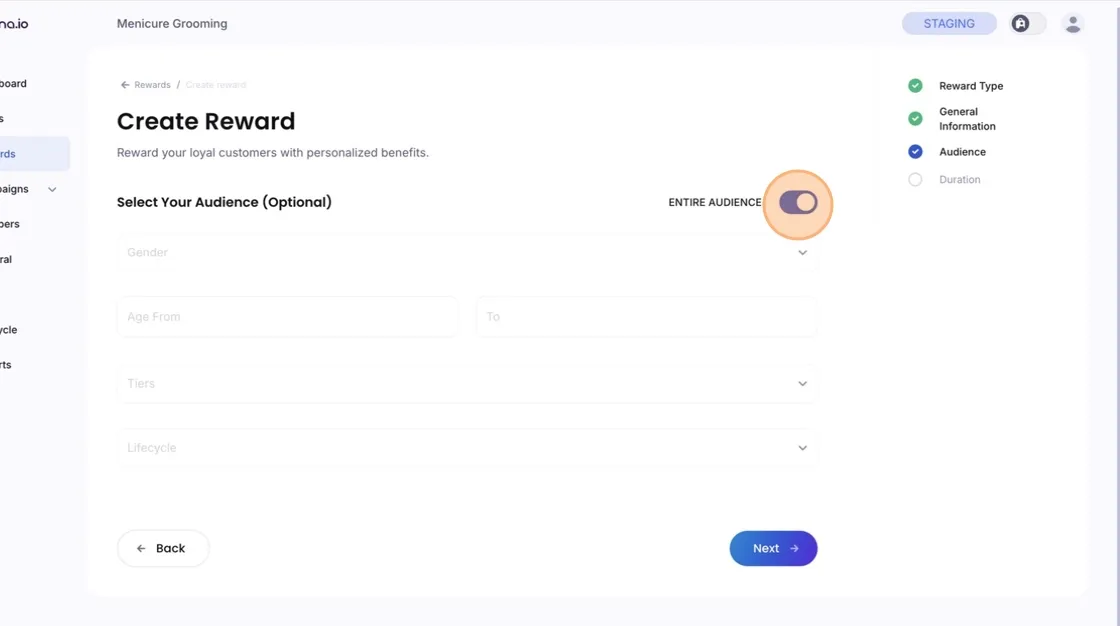
Verify/Select Audience
Choose whether this reward is available to:All members / Enitre Audience
Specific segments (e.g., VIPs, new members, etc.)
Click “Next.”
Set Expiration Rules
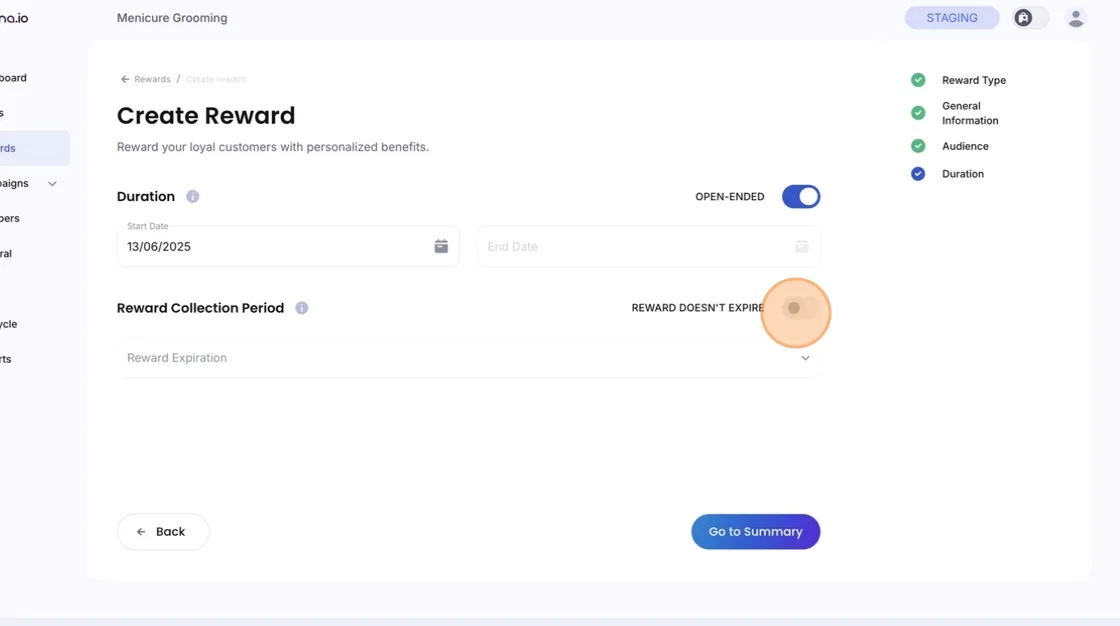
Enable Open-Ended if the reward does not have an expiry date.
Set Start Date for when the reward becomes available.
Toggle “Reward Doesn’t Expire After Claim” if it can be used anytime once claimed.
🧾 Final Step: Review & Publish
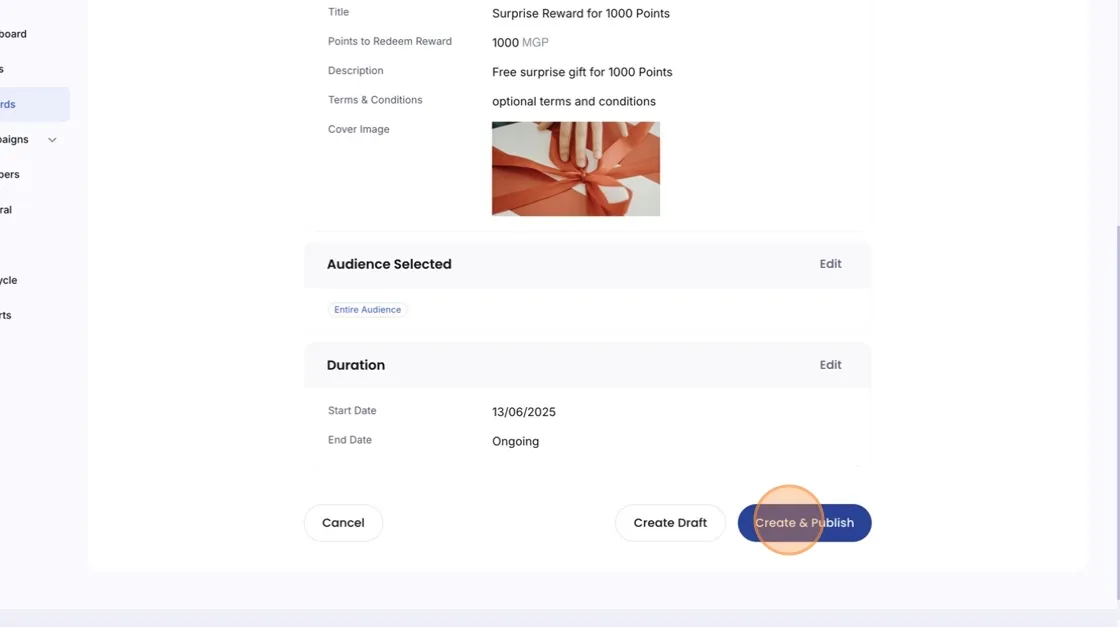
Click “Go to Summary”
Review all the reward details. If everything looks good, click “Create & Publish.”
🎉 Reward is Live!
Members will now see the reward and can redeem it using their points.
🔍 Example Reward Ideas
Title | Points | Type |
$5 Off | 500 | Fixed Discount |
Free Coffee | 800 | Product Reward |
10% Off Entire Bill | 700 | Percentage |
Surprise Gift 🎁 | 1000 | Surprise |
🛠 Tips for Success
Use attractive images: Rewards with good visuals perform better.
Match point values to product value: Ensure a consistent perceived value.
Create urgency: Set expiry dates or limited redemptions to increase engagement.
🧠 Common Questions
Q: Can I pause or edit a reward later?
Yes. Go to the Rewards tab, select the reward, and click Edit or Deactivate.
Q: Can I set tier-based access?
Absolutely! Combine reward visibility with your tier settings for exclusivity.