How to Set Up Your Points System in Ostana
Last updated: June 13, 2025
After creating your Ostana business account, the first step is to set up your loyalty points system. This allows you to define how customers earn points when they spend money with you.
📅 When Does Points Setup Happen?
Right after account creation, you’ll be prompted to set up your loyalty currency before you can create rewards, offers, or tiers.
🌟 Plan-Based Point Customization
Ostana offers three plans. Your ability to customize your points depends on the plan you choose:
1. Starter & Pro Plan
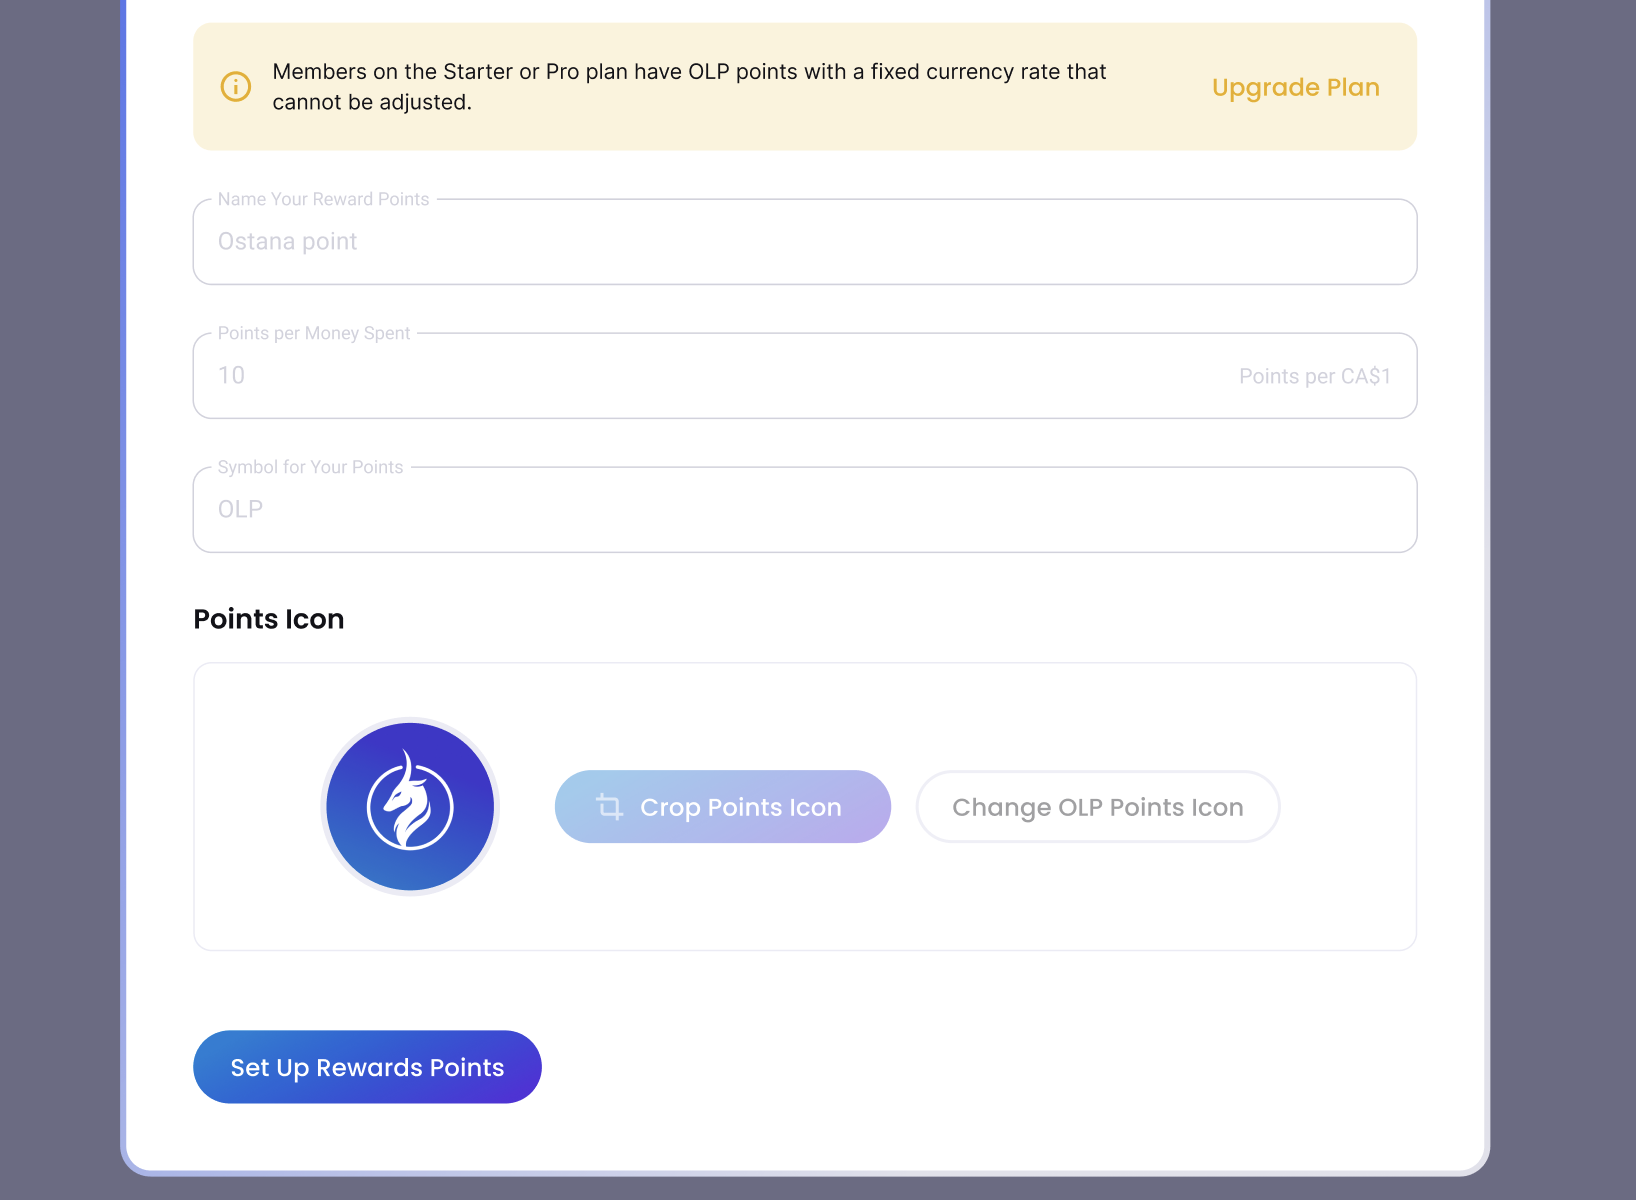
Uses Ostana's default point system: OLP (Ostana Loyalty Points)
Fixed ratio: 10 points for every $1 spent (1:10)
You cannot change the point name, symbol, or ratio
A default OLP icon is used
⚠ A notice will appear stating that point customization is locked under your current plan.
2. Elite Plan
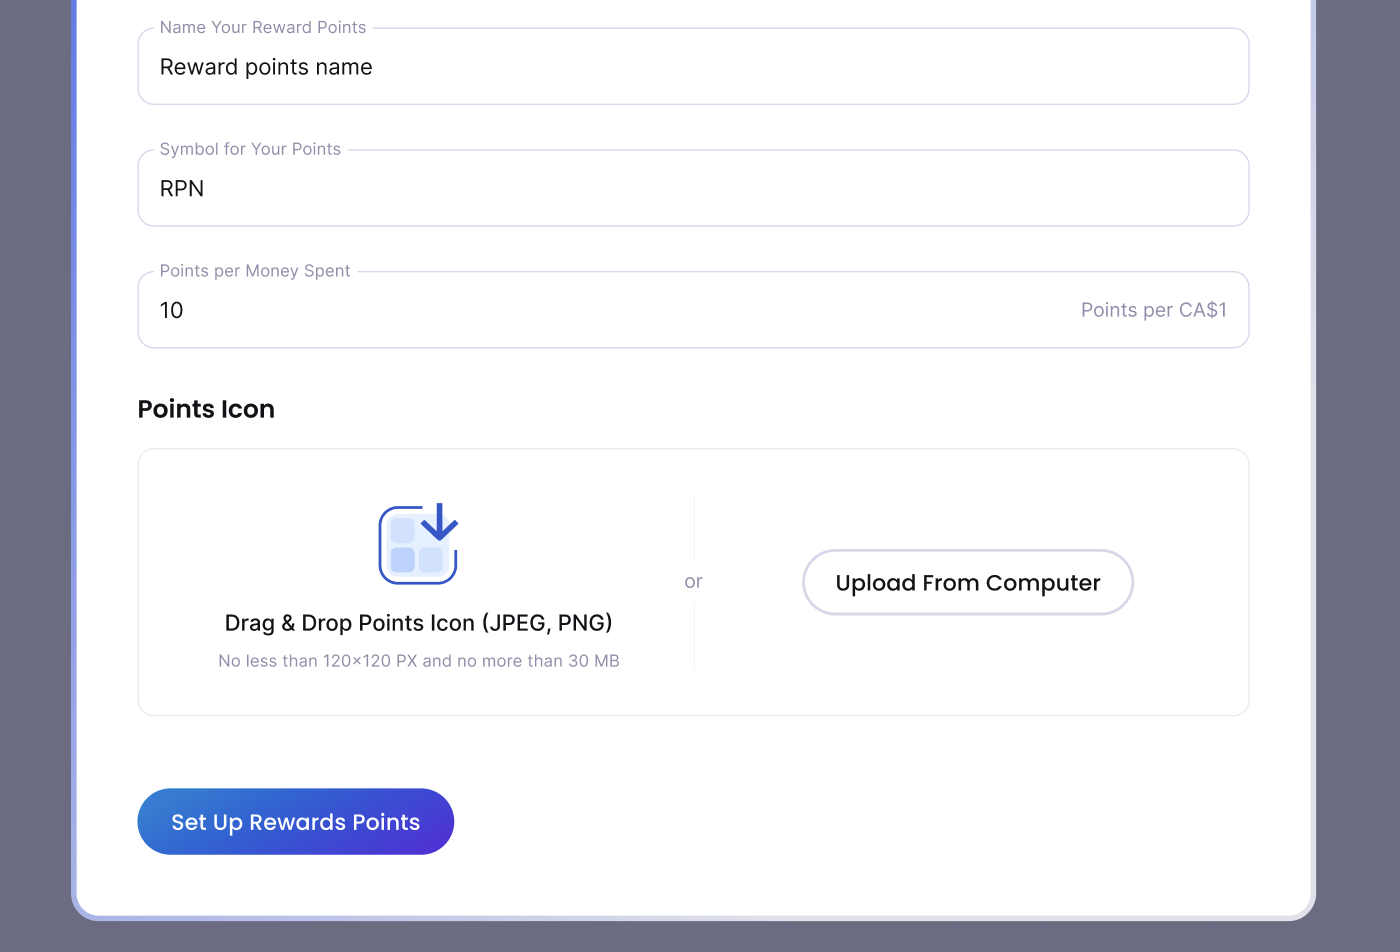
Full point branding available:
Custom Point Name (e.g., BrewBucks, BeautyCoins)
Custom Symbol (e.g., BB$, BCN)
Adjustable Ratio (e.g., 1:5, 1:20)
Upload a Custom Icon
🔗 Recommendation: Stick with the 1:10 ratio (10 points = $1) for simplicity and compatibility across features.
✅ Step-by-Step: Setting Up Points
For Elite Plan Users:
Name Your Points
Enter a unique name for your loyalty currency.Choose a Symbol
Add a short code or symbol to represent your points (e.g., BB, ✨).Set the Points-to-Dollar Ratio
Define how many points are earned per dollar spent.Upload a Points Icon
Drag and drop or upload from your device
Minimum: 120x120px, Max: 30MB
Click "Set Up Rewards Points" to save.
For Starter & Pro Users:
You’ll see the OLP system is pre-filled and locked
You can only click "Set Up Rewards Points" to proceed
🛠 Need to Customize but on Starter or Pro?

Upgrade to the Elite Plan anytime from your dashboard to unlock custom branding for your loyalty points.
🧐 Why Points Setup Matters
Ensures all purchases start earning points
Connects to rewards, offers, and campaigns
Keeps your brand front and center with a custom points system